In past articles, we learned about a simple approach to building scalable Selenium Grid cluster using Docker and selenium images in the virtual machines. But this article is more about building an improved and very easy scalable selenium Grid using an open source project named Selenoid with Docker.
How Selenoid is different from Selenium Grid:
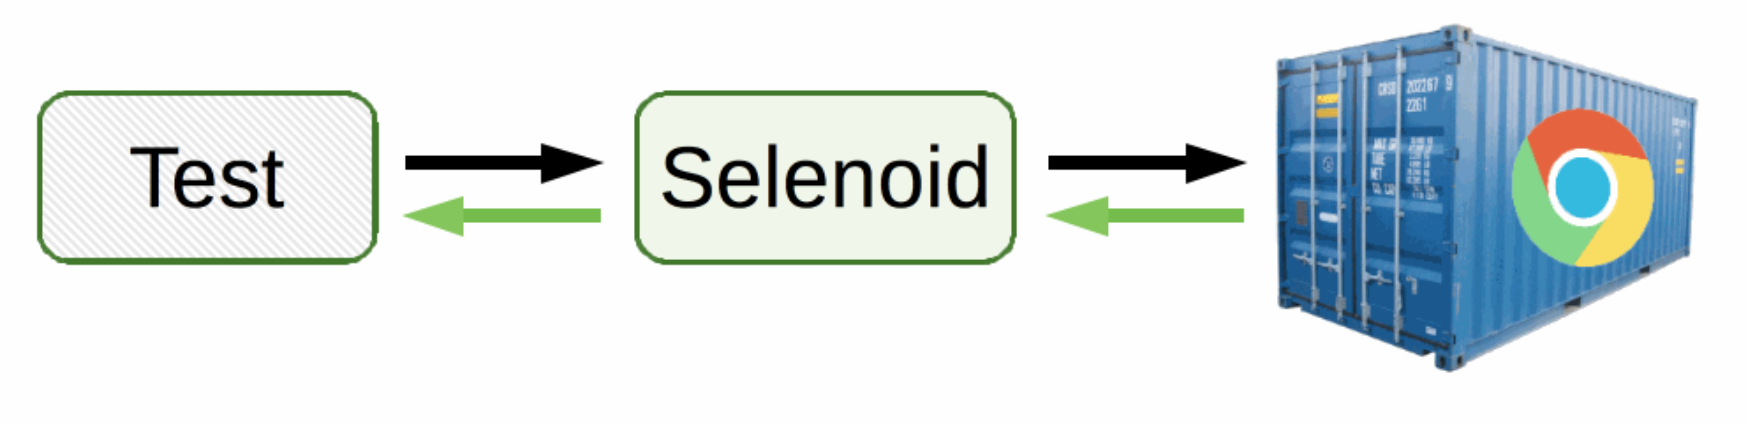
The main idea behind Selenoid is to start short-lived container for each Selenium session with a requested browser and stop it immediately when the session is closed from the Test. Such approach automatically resolves all issues related to session caches and sharing browser settings among sessions. Using Selenoid we don’t need to maintain the nodes running and taking the machine resources.
The theory behind Selenoid is one Hub running and managing requests for every container consists of specific browser version requested from the test. Using this approach we can save a lot of resources and the containers provide enough level of isolation between browser processes and Tests. This allows you to use an unlimited number of different browser versions in parallel.
How to use Selenoid Grid
Selenoid should be used with two components:
- Selenoid : Selenium Hub successor running browsers within containers. scalable, immutable, self hosted Selenium-Grid on any platform with single binary.
- Selenoid-ui : Graphical user interface for Selenoid project and check run time browsers and logs.
Now let’s create a simple Grid by using Selenoid Images with Docker on the local machine and you can run Test cases.
Prerequisite:
Docker should be installed on your machine where you want to run this Selenium Grid.
Create a DockerCompose File.
docker-compose file is a configuration file for docker, By using the compose files its easy to create and stop Containers. We are creating 2 services Selenoid and Selenoid-ui in docker-compose.yml file, which will run as 2 containers.You can read official documentation of docker compose file.
Let’s create a docker-compose.yml file in you local system.(You can copy paste.)
docker-compose.yml
version: '1'
services:
  selenoid:
    image: "aerokube/selenoid"
    command: -listen :4444 -conf /etc/selenoid/browsers.json -video-output-dir /opt/selenoid/video/ -timeout 3m
    network_mode: bridge
    ports:
      - "4444:4444"
    volumes:
      - "$PWD:/etc/selenoid/" # assumed current dir contains browsers.json
      - "/var/run/docker.sock:/var/run/docker.sock"
  selenoid-ui:
    image: "aerokube/selenoid-ui"
    network_mode: bridge
    links:
      - selenoid
    ports:
      - "8080:8080"
    command: ["--selenoid-uri", "http://selenoid:4444"]
browsers.json
Using the docker-compose file we have to pass the browsers using a Json file. browsers.json file contains all the browsers and their version we want to run in the Selenoid grid. In our JSON file we are defining Chrome Version as 61.0 and we are going to use chrome browser in the Selenoid instance.
Let’s create a browsers.json file in the current directory where docker-compose.yml file is present.
{
"firefox": {
"default": "latest",
"versions": {
"latest": {
"image": "selenoid/firefox",
"port": "4444",
"path": "/wd/hub",
"tmpfs": {"/tmp":"size=512m"}
			}
		}
	},
"chrome": {
"default": "61.0",
"versions": {
"61.0": {
"image": "selenoid/vnc:chrome_61.0",
"port": "4444",
"tmpfs": {"/tmp":"size=512m"}
		 }
		}
	}
}
What is Selenoid UI :
Selenoid UI is also a very cool feature in the Selenoid project where We can see the Live Test Running on multiple containers. If you look closely in to the composer file above the selenoid-ui service is running on port No : 8080 and linked with the selenoid service.
So if we run the docker compose file above the docker container will start both the service by default. We can access the UI using the URL: localhost:8080
Start the Selenoid Grid:
Starting the Selenoid Grid is very easy and simple by using the docker-compose file we have made in above steps. Let’s run the following command from where our docker-compose.yml file is present:
docker-compose up -d

After running the docker compose command, Docker will automatically download the proper images of selenoid before starting the container. We can see the 2 containers running using command: docker ps
. Please check the Port Numbers and IMAGES to understand more about what containers are running.
Selenoid resolves the problem of creating containers with the proper browser and browser versions. As Selenoid Hub which is running on 4444 port will receive the request and create a container with the browser asked from Test script and will kill the container after the Test.
VNC and LOGS:
To see and initialize the VNC and display the Running browsers from the container, We need to set the browser capability in our Test with enableVNC=true capability. After Implementing this we will be able to see the Browsers and logs in the VNC Url. Below is the Example Class which can run Test on Chrome Browser with enableVNC.
Example Java Code to Run Test
import java.net.URL;
import org.openqa.selenium.WebDriver;
import org.openqa.selenium.chrome.ChromeOptions;
import org.openqa.selenium.remote.DesiredCapabilities;
import org.openqa.selenium.remote.RemoteWebDriver;
import org.testng.annotations.Test;

public class RunningTestOnSelenoidGrid {

	@Test
	public void runTestOnDocker() throws Exception {
		DesiredCapabilities dcap = DesiredCapabilities.chrome();
		ChromeOptions options = new ChromeOptions();
		dcap.setCapability(ChromeOptions.CAPABILITY, options);
		dcap.setCapability("enableVNC", true);
		dcap.setBrowserName("chrome");
		dcap.setVersion("61.0");

		String driverPath = <chromedriver path on your machine>;
		System.setProperty("webdriver.chrome.driver", driverPath);

		URL url = new URL("http://localhost:4444/wd/hub");
		WebDriver driver = new RemoteWebDriver(url, dcap);

		// Get URL
		driver.get("https://www.google.com/");
		// Print Title
		System.out.println(driver.getTitle());
	}
}
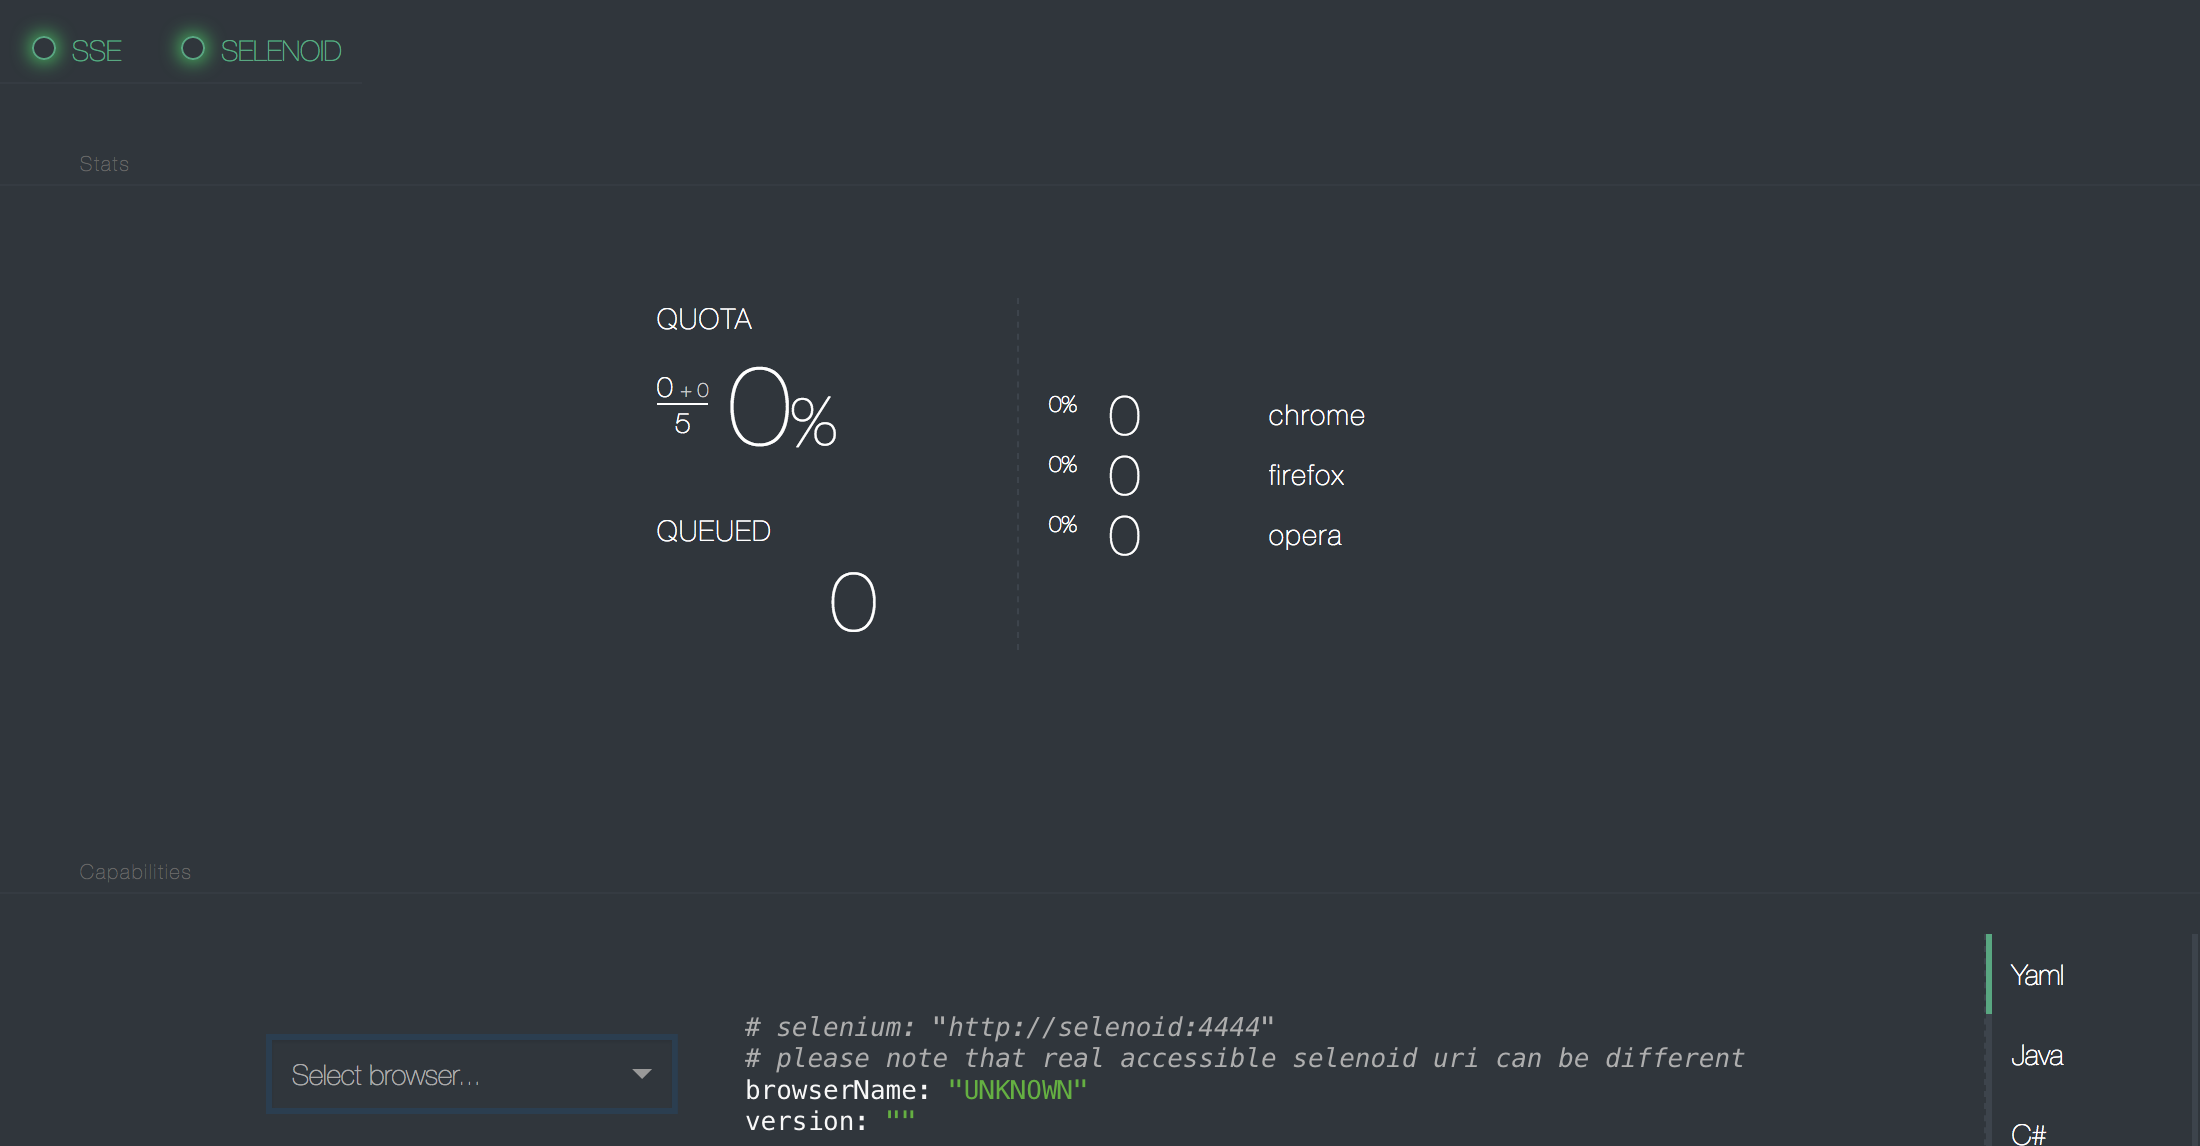
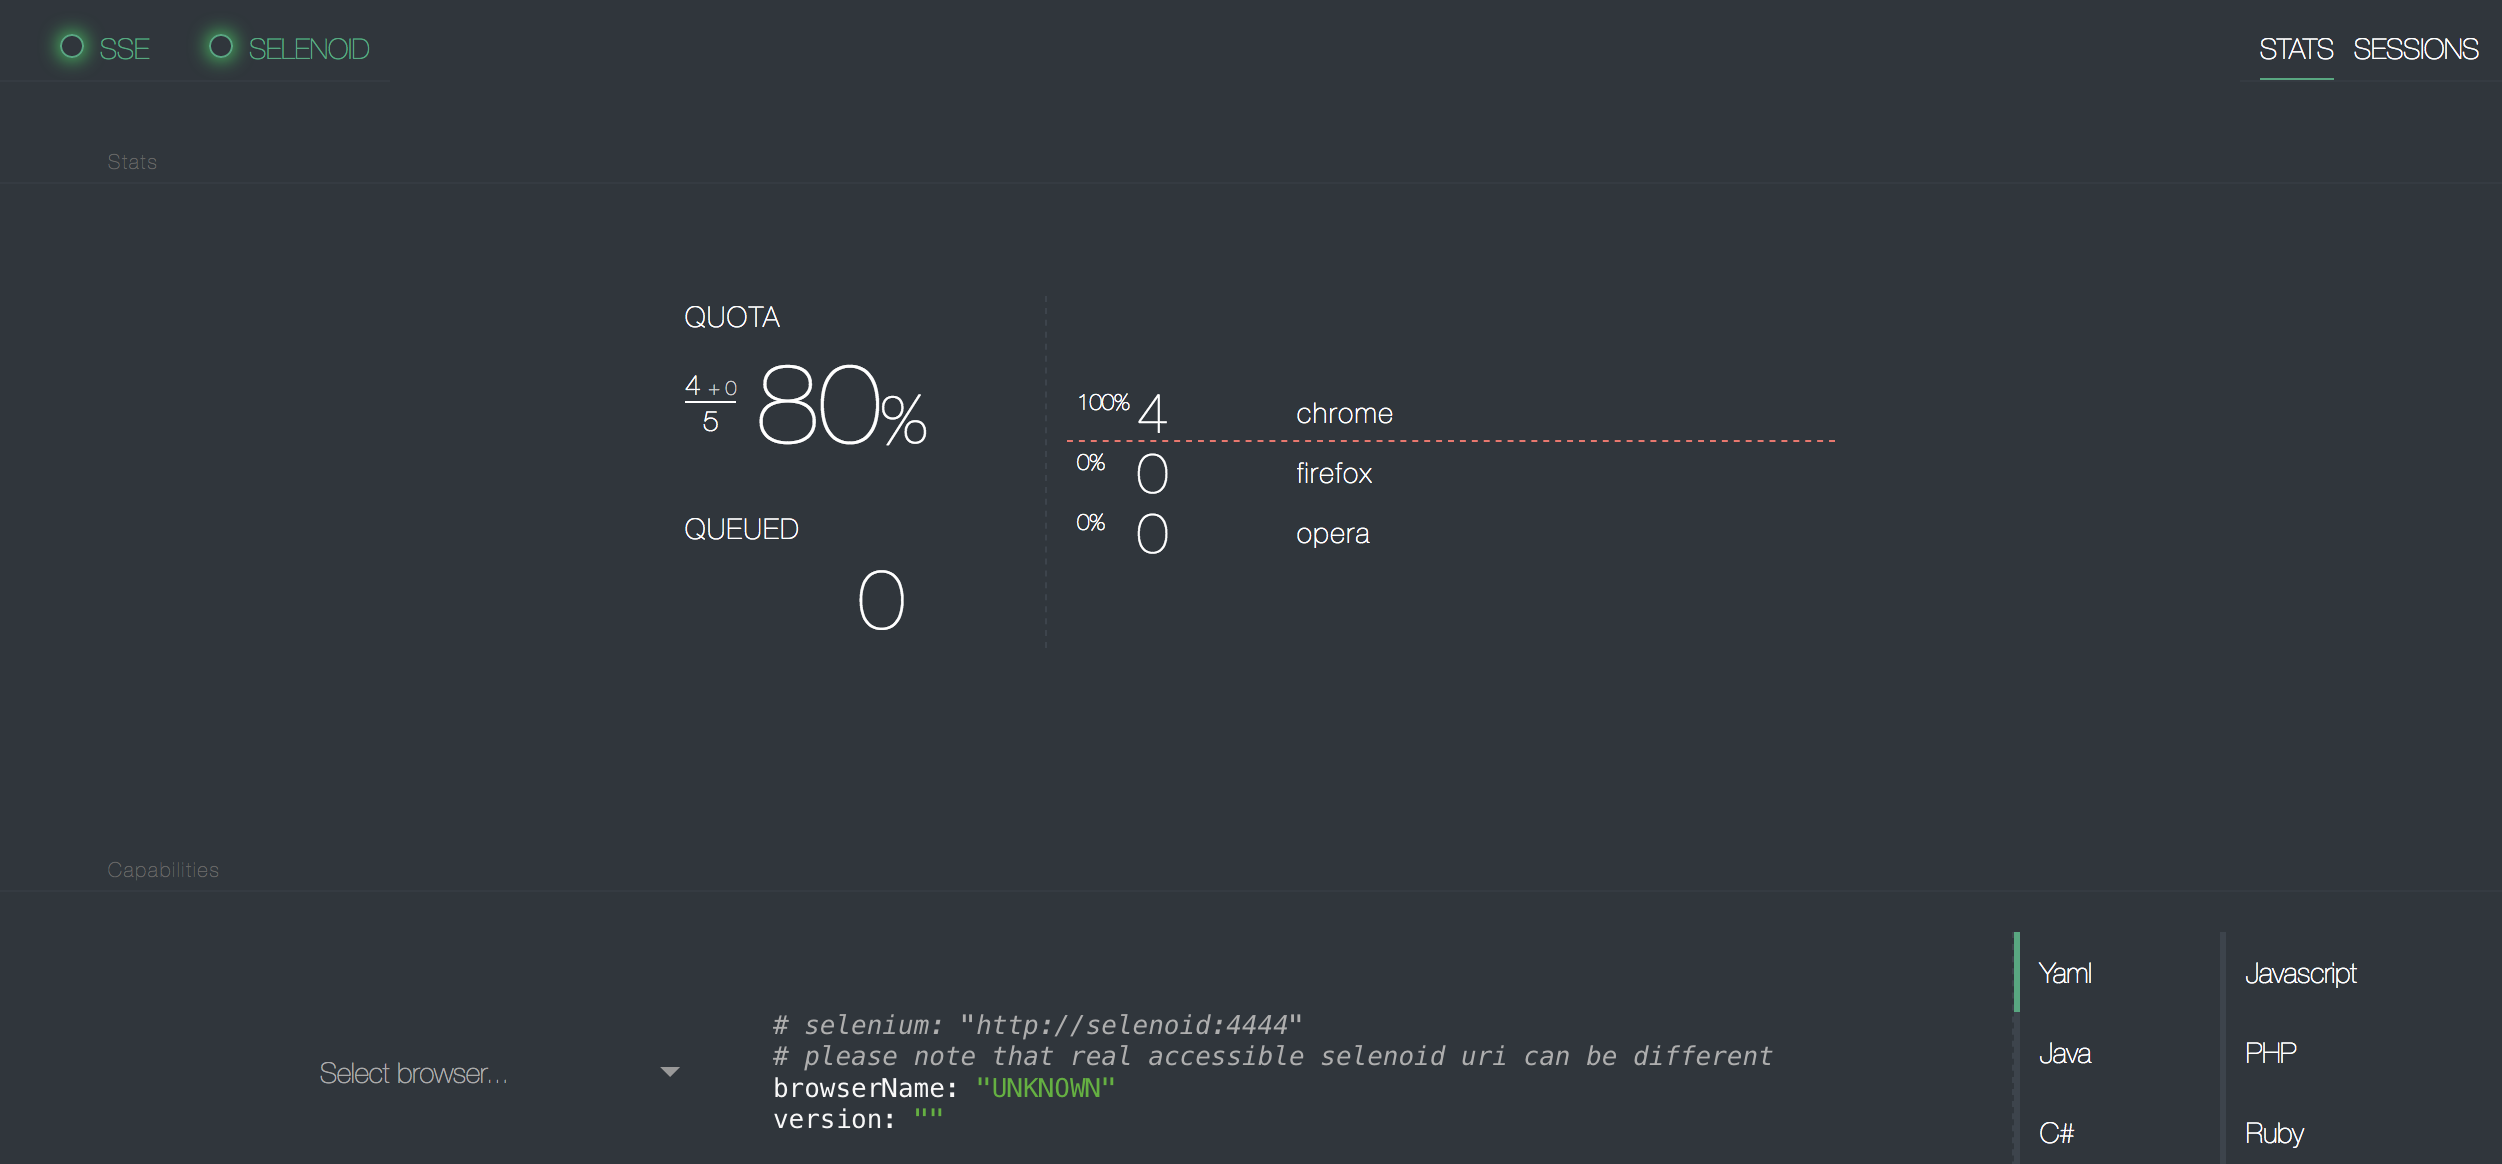
Stats:
Statistics about the Test cases at run time like what browsers are running. You can open the VNC Url by opening : http://localhost:8080 as our selenoid-ui is running at port no : 8080(You can configure port in docker-compose file.)
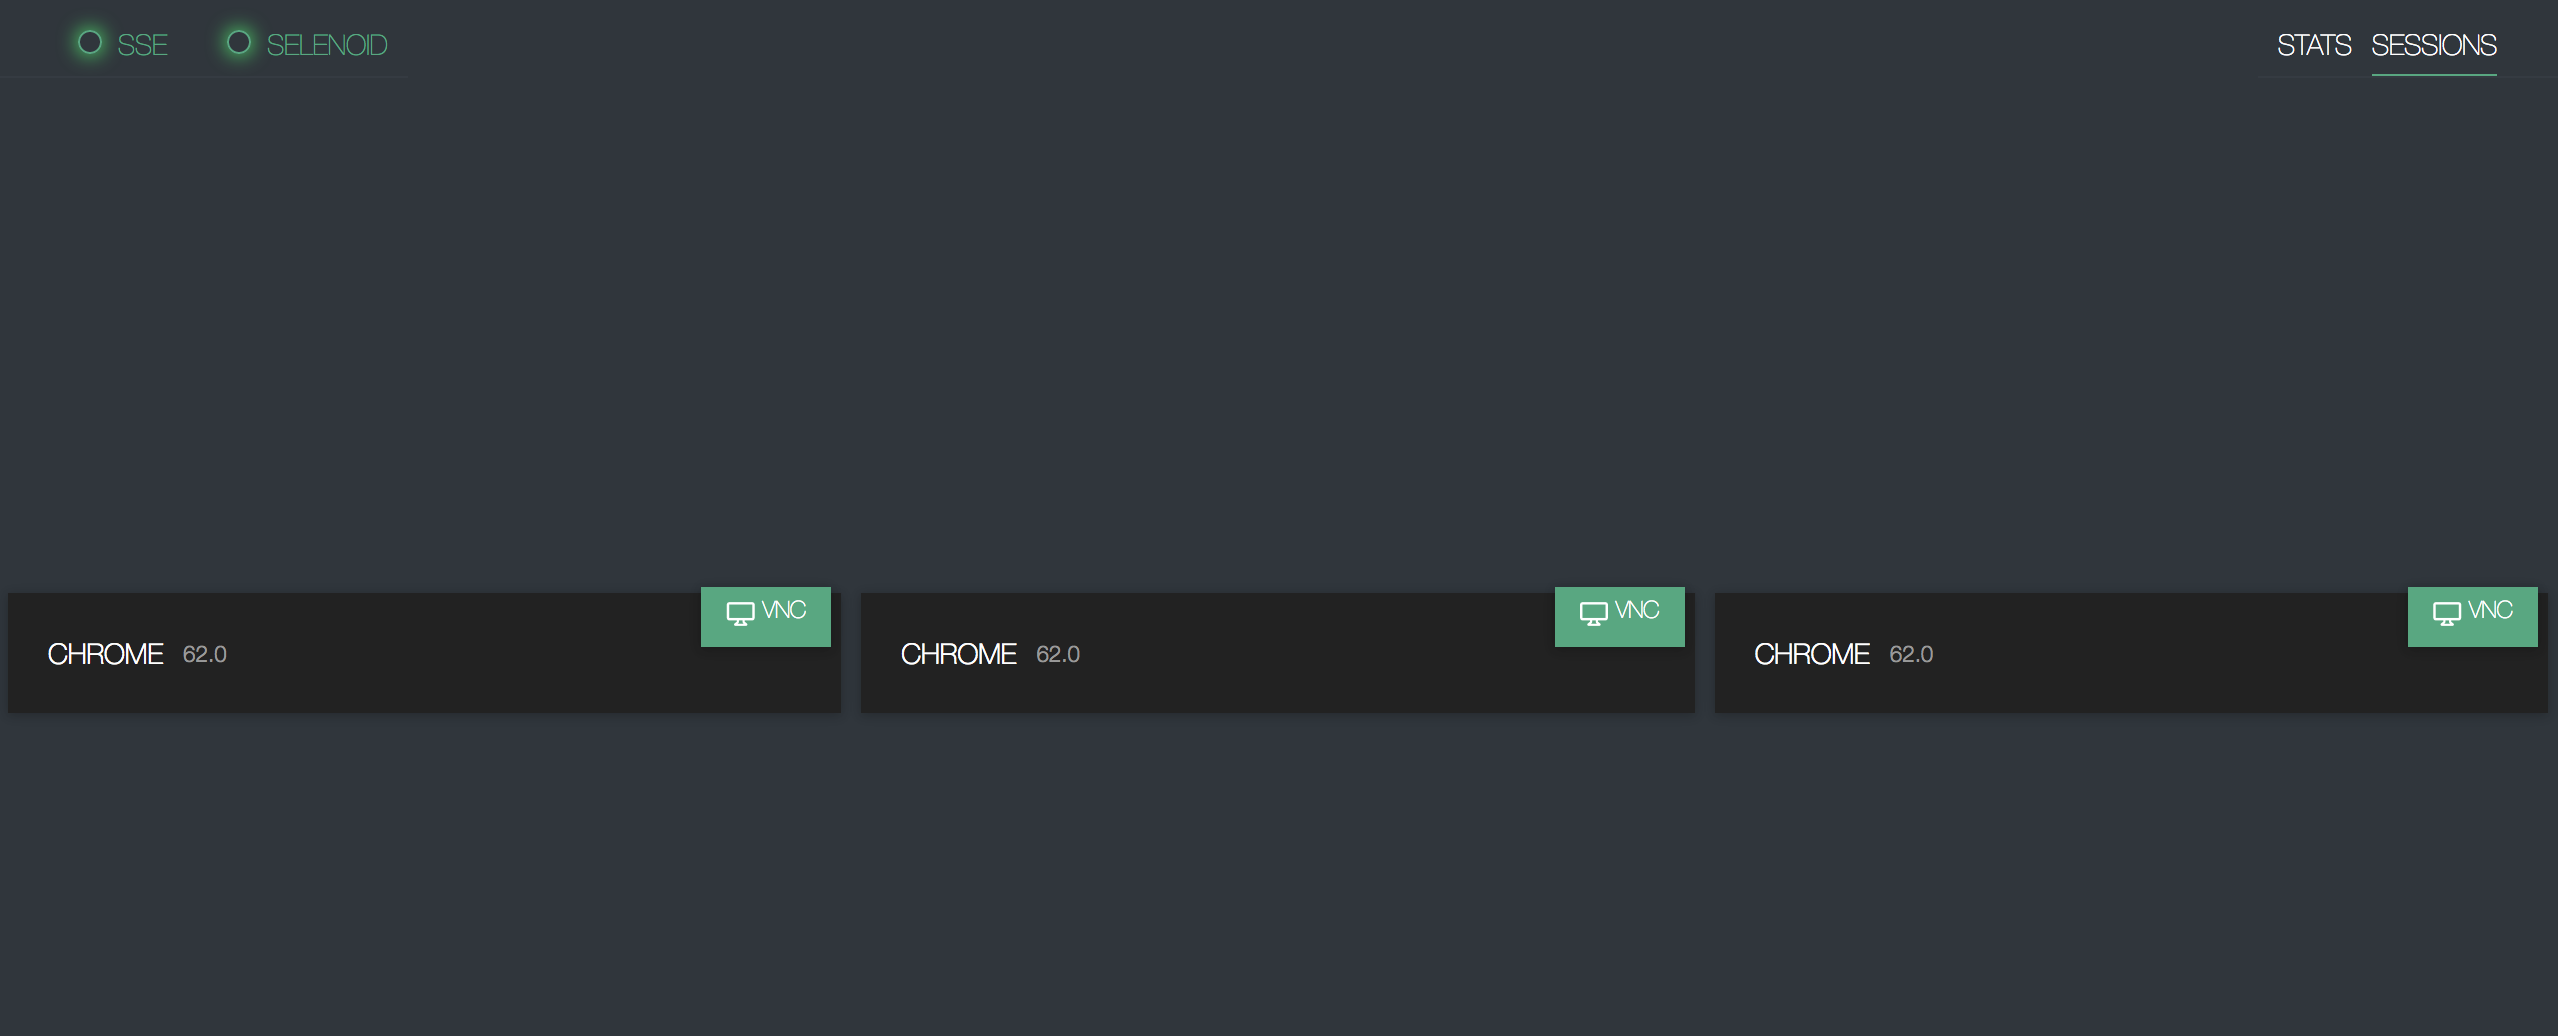
Session List:
List of all the Sessions where you can open any of the session from the list to see the browser running live our Test case.
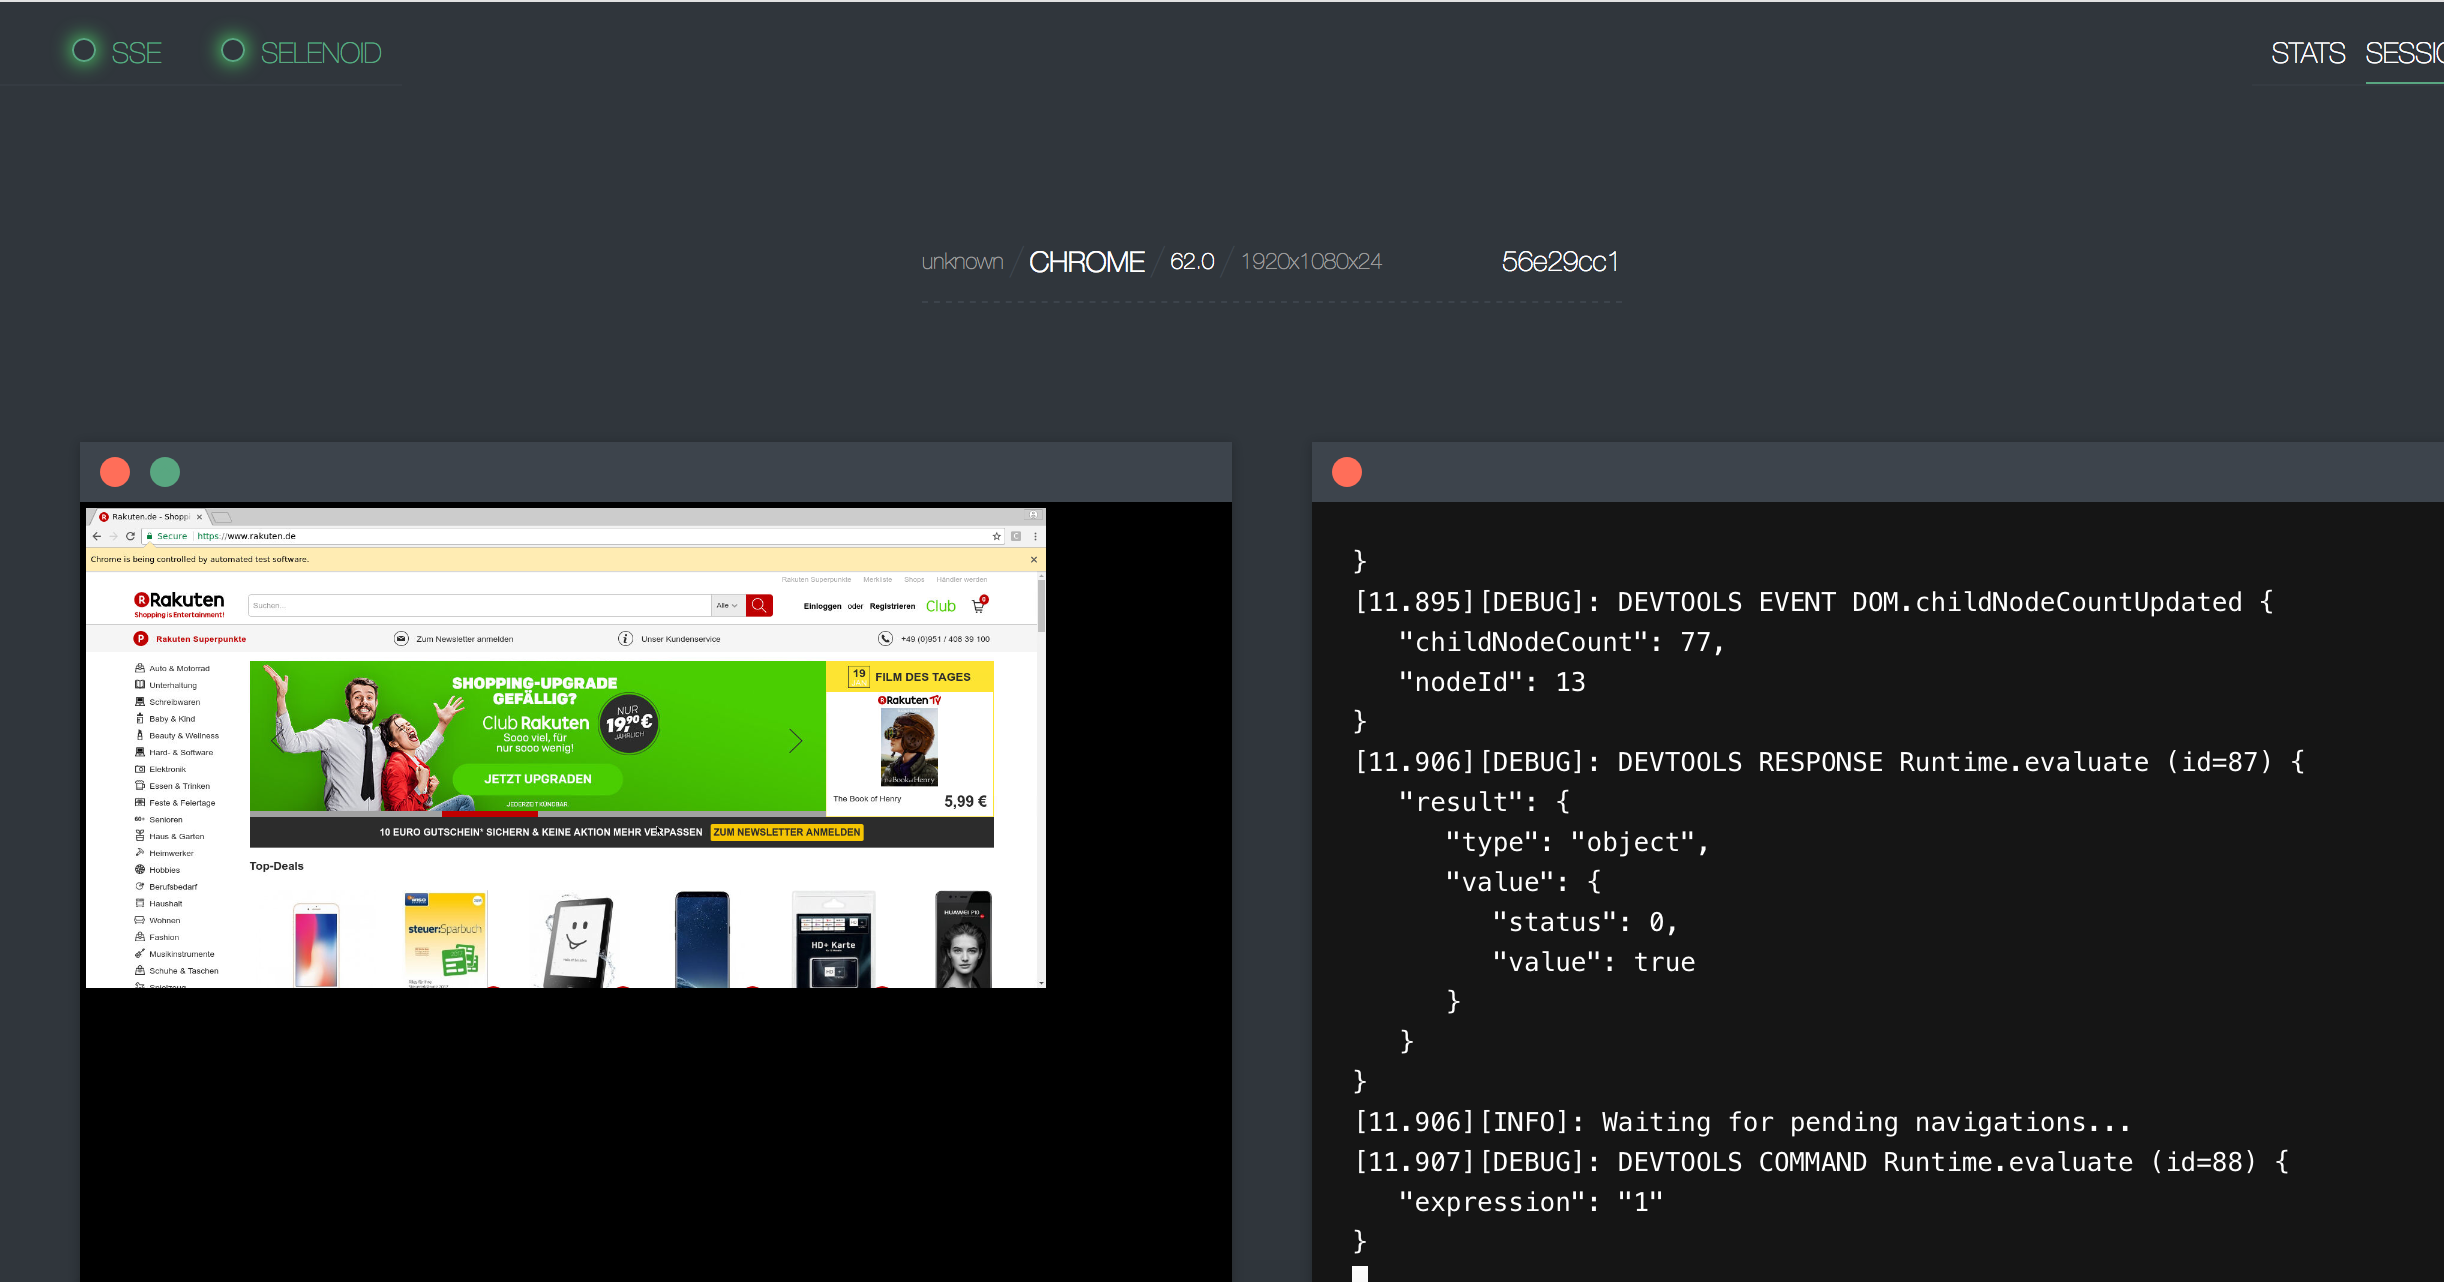
Session:
VNC allows to see and interact with browser at real time and you can check the logs from the container which is showing all the actions:
Please feel free to Write me and give suggestions about Selenoid in the comments.
Thanks for reading!